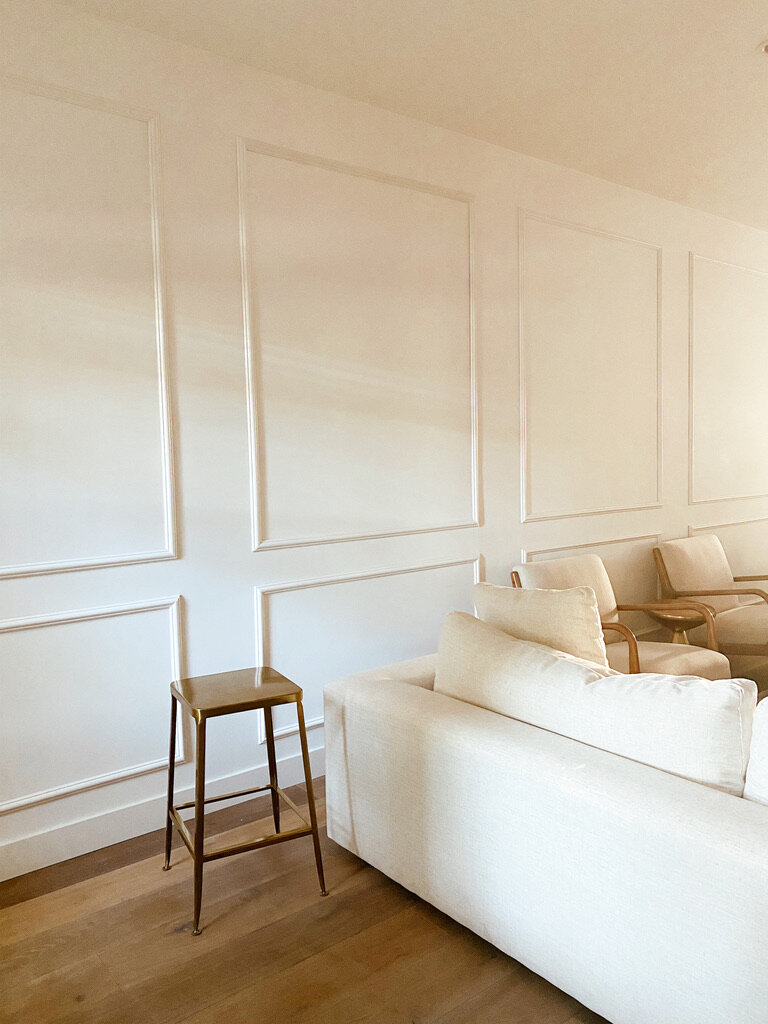
walls with molding
Happy newsletter day!
Last week we spoke about how you should get out there and start making your renter home YOUR home. Adding your DIY projects and your own style to the house will automatically make it feel like your’s regardless if you rent or own.
One project that I did to spruce up my space was adding molding to my walls. My living room is a big rectangular room with 10 ft ceilings. It felt as though I needed to add so much to the room to make it feel less empty. However, that’s definitely not the case! By adding the molding, it helped elongate the walls and add much more depth to to what felt so empty.
The project took me a total of roughly 5 hours and cost me $150. THE OUTCOME WAS AMAZING!
Materials
Blade with Plastic Miter Box
Trim
Paint
Paint Brushes
Double sided mounting tape
Caulk
Bosch Laser Level
Painters Tape
Measuring Tape
Friendly note: I recommend going to Lowe’s to see what trim you like best! You also want to paint the trim to be the same color as your wall.
First Step
Measure your wall and see how many squares / how big you would like your squares to be. You don’t have to have one big square and one little square. There are so many different designs on how you can incorporate trim on to your wall. Like I always say, do whatever you think is best regardless if it’s not the “norm.” This is YOUR space.
Second Step
Once you’re done measuring, and you’ve sketched out a layout design, take out your Bosch Laser Level. Start measuring out your blueprint onto your wall and add the painters tape to get a good visualization of what the design would look like. If you don’t like it, redo steps 1 and 2 until you do! Disclaimer: I was going to do one big square, then quickly realized I didn’t like it when I applied the painters tape onto my wall. Example below with my little babies!
Third Step
Take our your measuring tape and measure out your trim. REMINDER: cut your edges at a 45 degree angle and ensure your pieces can connect with one another. Example: A right 45 degree angle will connect to a left 45 degree angle, thus forming a 90 degree angle.
Fourth Step
Paint your trim to match the color of your wall! You may not think so, but this is actually the longest process because waiting for paint to dry is….. horrible haha
Fifth Step
Add your double sided mounting tape to each piece of trim. You can add however many you want. I added 3 on my long pieces and 2 on my shorter pieces. Remove your painters tape on the wall, and take back out the Bosch Laser Level. Start sticking those pieces of trim on to your wall!!
Sixth Step
You’ll notice when you connect your trim pieces on your wall, there may be a small gap between the pieces. Grab your caulk and apply it to the gaps. I simply used my finger to even spread the caulk and viola the gap is gone!
THEN YOU’RE ALL DONE!
Trust me it is totally worth it! I absolutely love my wall and have no regrets whatsoever. If you feel like doing this, you can also see videos on my highlights under “molding” or on my tiktok. Hope you enjoy the process! You can always message me on instagram if you have any questions - I’m always happy to help!
Start making your place YOUR’S!
xoxo
Kathleen


